· Web Development · 5 min read
Access Local Projects Anywhere with Localtunnel
Want to share your local project with the world? Learn how to expose your project over a public IP and let others access it from anywhere!
Overview
As developers, there are times when we’re working on a proof of concept (POC), or when our project isn’t ready for full deployment. In these cases, we may need a way to share our local development environment remotely with others; whether for collaboration, feedback, or troubleshooting. Fortunately, tools like Localtunnel make this process quick and easy.
What is Localtunnel?
Localtunnel is a free, open-source service that allows you to expose your local development environment to the internet by generating a publicly accessible URL. This means you can share your local project with anyone, regardless of their location or network, even if it’s not deployed on a public server yet.
Localtunnel is a simple and powerful tool that lets you route incoming requests to your locally running web server, without having to mess with DNS configurations, firewall settings, or complex server setups. It’s especially useful for tasks like testing APIs, collaborating with remote teams, or demonstrating your project to clients or stakeholders before it goes live.
Note: Since Localtunnel provides a temporary, secure URL, it’s a great solution for quick demos, user feedback, or collaborative development, all without needing to deploy your project publicly.
Project Structure
For this article, I will use two projects:
- Node.js Backend: Running on
http://localhost:5000, serving APIs. - React Frontend: Running on
http://localhost:3000, interacting with the API.
Project Requirements
Before we begin, ensure that you have the following installed and set up:
- Node.js: The runtime for running JavaScript code outside the browser.
- npm (Node Package Manager): To install and manage packages like Localtunnel.
- If you haven’t installed them yet, visit Node.js official website for installation instructions.
Install Localtunnel
To install Localtunnel globally on your machine, run the following command in your terminal:
npm install -g localtunnel
Verify Installation
To confirm that Localtunnel is installed correctly, check its version by running:
lt --version
You should see an output like 2.0.2 or any later version.
Running the Projects
Start Backend and Frontend
Now, let’s run both the Backend and Frontend applications. The Backend will provide API endpoints, while the Frontend will serve the user interface, connected to the Backend.
Run both applications, in my case using the following command:
npm run dev
This will start both applications:
The Backend will be accessible at: http://localhost:5000
The Frontend will be accessible at: http://localhost:3000
You can test the API with tools like Postman for the Backend, and open the Frontend in your browser to interact with the user interface and make sure both the projects are accessible locally.
Expose Local Servers to the Public
To make your local applications accessible remotely, we’ll use Localtunnel to generate public URLs that proxy traffic to your local servers.
Expose the Backend
To expose the Backend API remotely, run:
lt --port 5000
This will generate a public URL (for example: https://shy-parts-reply.loca.lt) for your Backend, allowing remote access to http://localhost:5000.
Expose the Frontend
Similarly, to expose the Frontend application remotely, run:
lt --port 3000
This will generate a public URL (for example: https://four-hats-learn.loca.lt) for your Frontend, making http://localhost:3000 accessible from anywhere.
IMPORT NOTE:
If your Frontend is configured to communicate with the Backend via a localhost URL (e.g., http://localhost:5000/api), this will not work when you access your application through the Localtunnel public remote URL.
To make the Frontend communicate with the Backend correctly over the public URL, you must generate a Public URL for the the Backend and connect your Frontend to point to that Public URL.
For example, in my case, I will replace the localhost URL with the Backend Localtunnel URL:
- Before:
const BACKEND_URL = "http://localhost:5000/api" - After:
const BACKEND_URL = "https://shy-parts-reply.loca.lt/api"
  const BACKEND_URL = "https://shy-parts-reply.loca.lt/api";
  useEffect(() => {
    fetch(`${BACKEND_URL}/users`).then(res => {
      return res.json()
    }).then(users => {
      console.log(users)
    })
  }, [])
Accessing Public URLs for the First Time
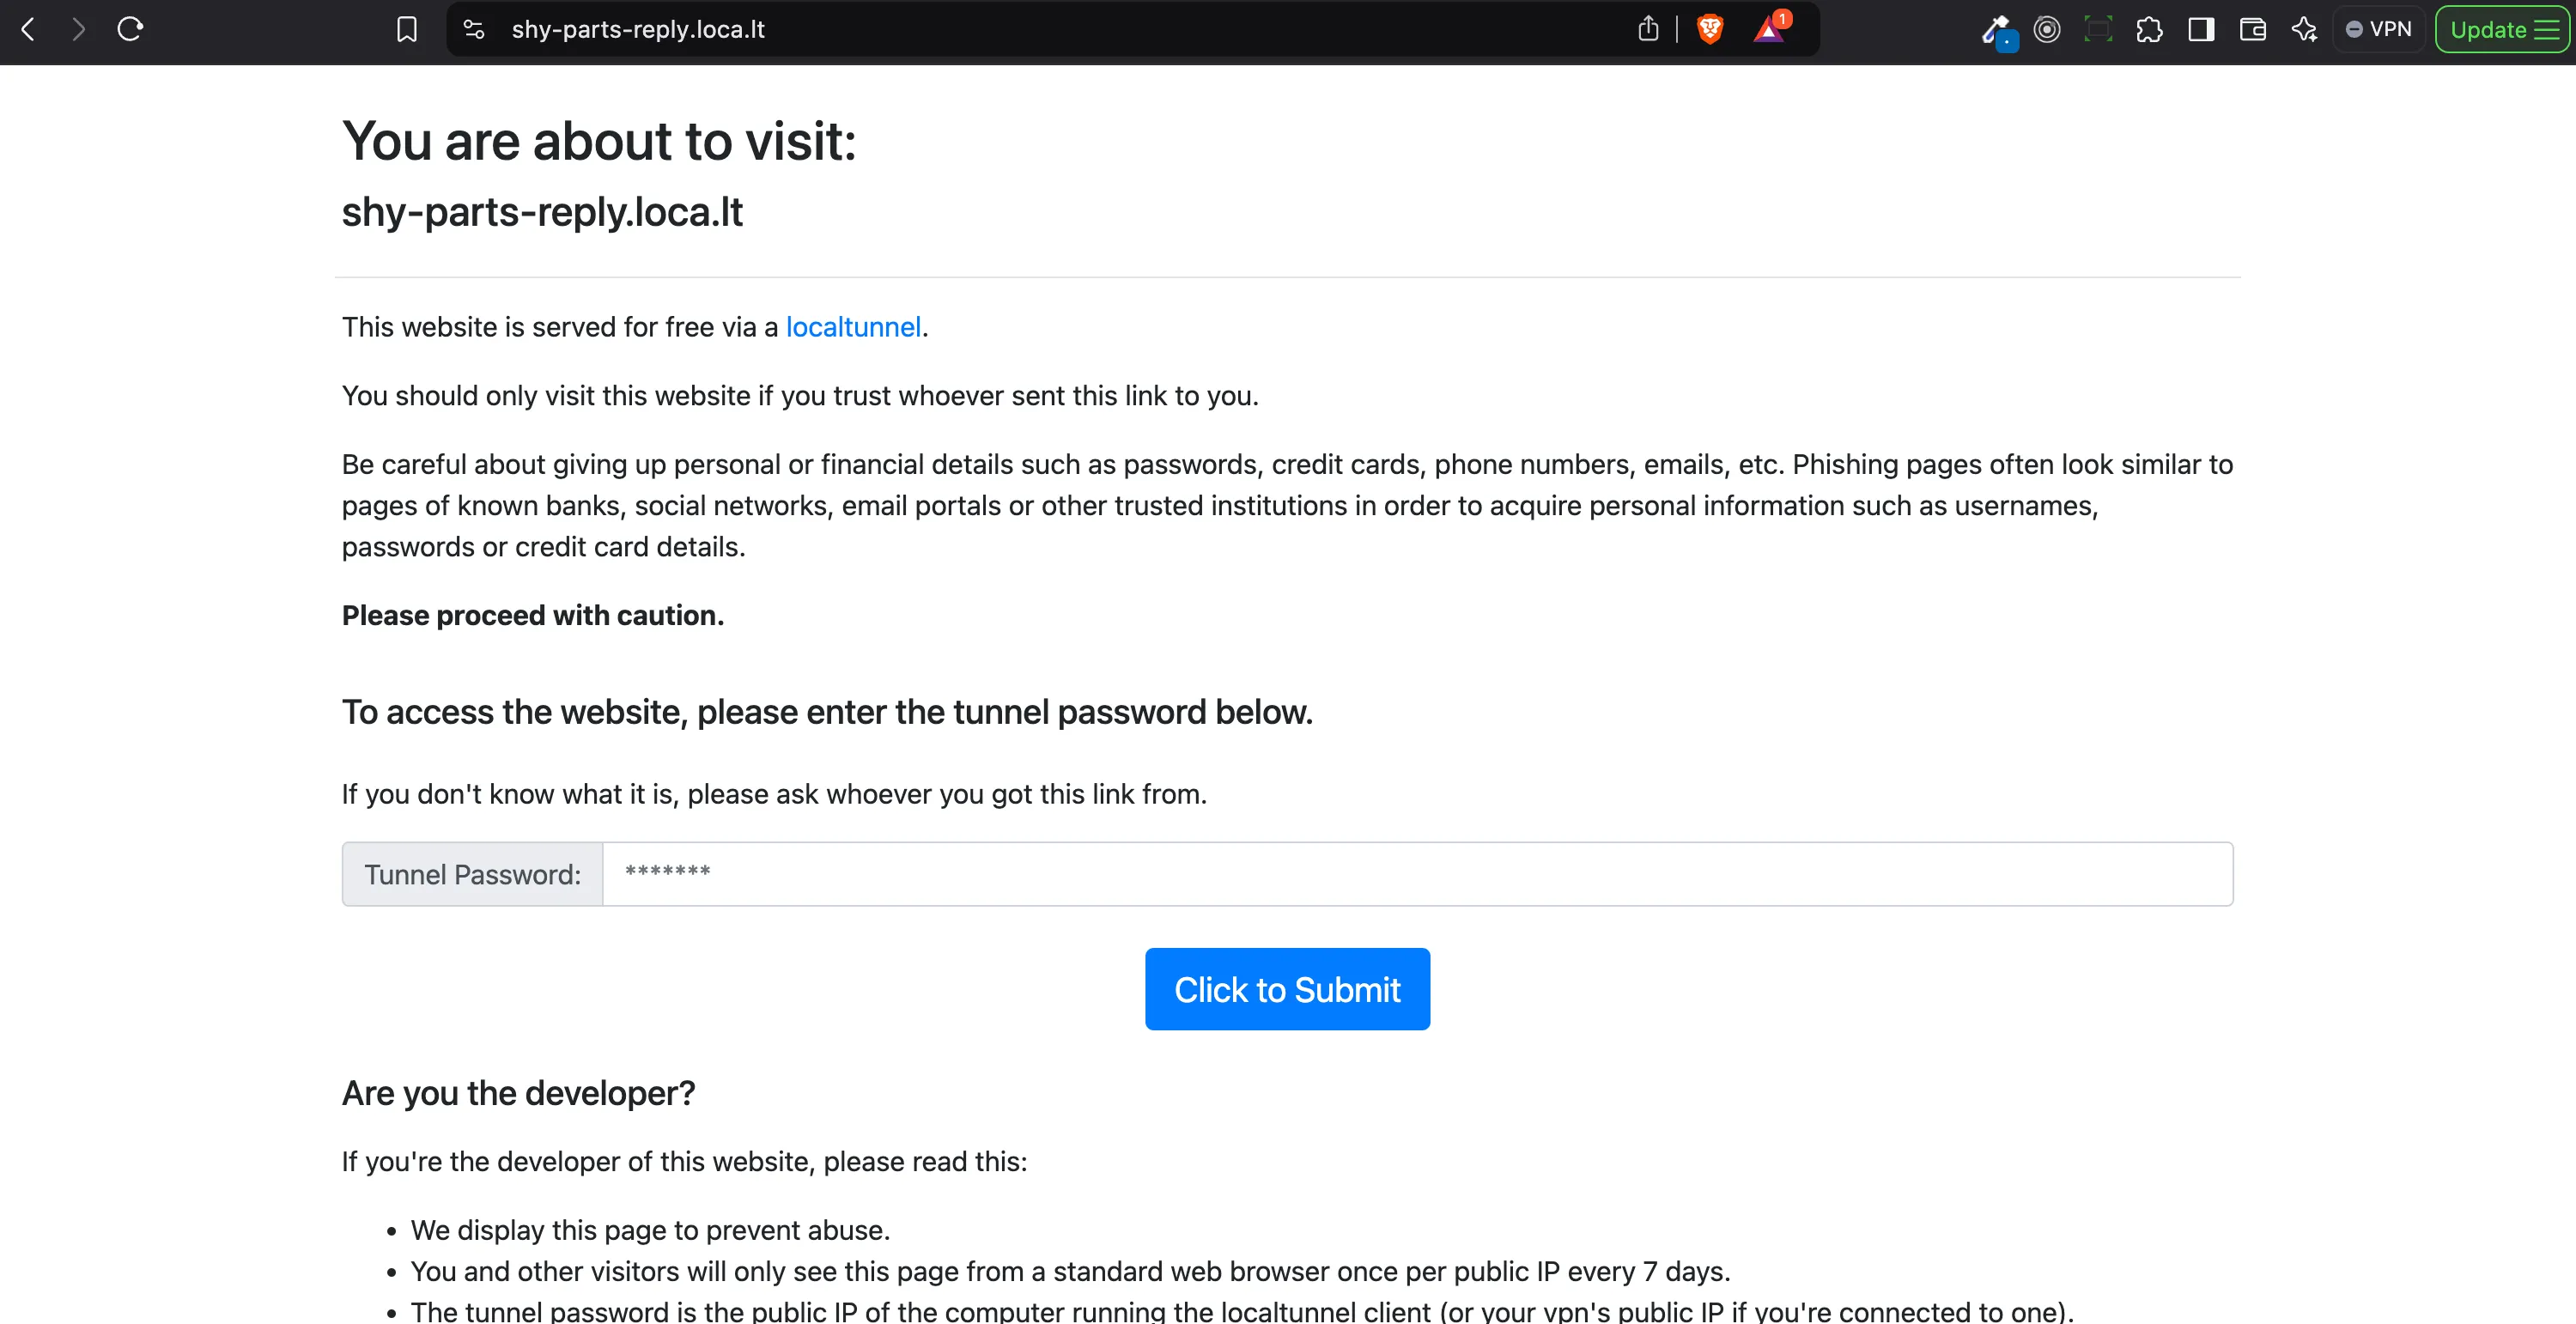
When you try to access your public URL (e.g., https://shy-parts-reply.loca.lt) for the first time, you may encounter a page asking you for a Tunnel Password. This is a security measure to protect your local environment from unauthorized access.

How to Retrieve Your Tunnel Password
You can obtain the Tunnel Password in one of the following ways:
If you’re running the Localtunnel client on your local computer:
- Simply open a web browser on the same computer and visit the following URL:
https://loca.lt/mytunnelpasswordThis will display your Tunnel Password directly in the browser.
- Simply open a web browser on the same computer and visit the following URL:
If you’re running the Localtunnel client on a remote computer (via SSH):
- SSH into the remote machine and run one of the following commands:
curl https://loca.lt/mytunnelpassword
# OR
wget -q -O - https://loca.lt/mytunnelpassword
- SSH into the remote machine and run one of the following commands:
Share Your Work with Others
Now that your local project is exposed to the public, you can easily share the generated URL with others for feedback, testing, or collaboration. Whether you’re working with a remote team or showcasing a demo to a client, Localtunnel makes it effortless to share your work in progress without worrying about deploying it to a public server.
Final Thoughts
Using Localtunnel is a great way to quickly share local projects with others or access them remotely without the need for complex server setups. It’s particularly useful for development, testing, or showcasing your work while keeping your project local and private.
Have fun collaborating with others, and make sure to disconnect the Localtunnel session once you’re done to ensure security.

